这篇文章主要介绍了C#使用命名管道Pipe进行进程通信实例详解,文中通过示例代码介绍的非常详细,对大家的学习或者工作具有一定的参考学习价值,需要的朋友们下面随着小编来一起学习学习吧
1.新建解决方案NamedPipeExample 新建两个项目:Client和Server,两者的输出类型均为“Windows 应用程序”。整个程序的结构如下图所示。
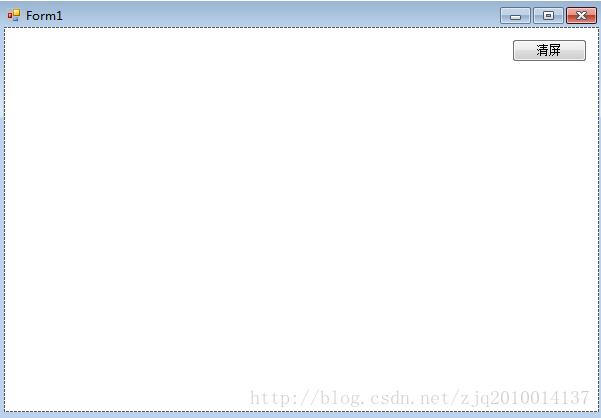
此Form1为Client的窗体,如下图所示。
后端代码,如下。
using System;
using System.Collections.Generic;
using System.ComponentModel;
using System.Data;
using System.Drawing;
using System.Linq;
using System.Text;
using System.Threading.Tasks;
using System.Windows.Forms;

using System.IO;
using System.IO.Pipes;
using System.Security.Principal;

namespace Client
{
  public partial class Form1 : Form
  {
    NamedPipeClientStream pipeClient =
      new NamedPipeClientStream("localhost", "testpipe", PipeDirection.InOut, PipeOptions.Asynchronous, TokenImpersonationLevel.None);
    StreamWriter sw = null;
    public Form1()
    {
      InitializeComponent();
    }

    private void Form1_Load(object sender, EventArgs e)
    {
      try
      {
        pipeClient.Connect(5000);
        sw = new StreamWriter(pipeClient);
        sw.AutoFlush = true;
      }
      catch (Exception ex)
      {
        MessageBox.Show("连接建立失败,请确保服务端程序已经被打开。");
        this.Close();
      }
    }

    private void btnSend_Click(object sender, EventArgs e)
    {
      if (sw != null)
      {
        sw.WriteLine(this.txtMessage.Text);
      }
      else
      {
        MessageBox.Show("未建立连接,不能发送消息。");
      }
    }
  }
}
此Form1为Server的窗体,如下图所示
后端代码,如下。
using System;
using System.Collections.Generic;
using System.ComponentModel;
using System.Data;
using System.Drawing;
using System.IO;
using System.IO.Pipes;
using System.Linq;
using System.Text;
using System.Threading;
using System.Threading.Tasks;
using System.Windows.Forms;
namespace Server
{
public partial class Form1 : Form
{
NamedPipeServerStream pipeServer =
new NamedPipeServerStream("testpipe", PipeDirection.InOut, 1, PipeTransmissionMode.Message, PipeOptions.Asynchronous);
public Form1()
{
InitializeComponent();
}
private void textBox1_TextChanged(object sender, EventArgs e)
{
}
private void Form1_Load(object sender, EventArgs e)
{
ThreadPool.QueueUserWorkItem(delegate
{
pipeServer.BeginWaitForConnection((o) =>
{
NamedPipeServerStream pServer = (NamedPipeServerStream)o.AsyncState;
pServer.EndWaitForConnection(o);
StreamReader sr = new StreamReader(pServer);
while (true)
{
this.Invoke((MethodInvoker)delegate { lsvMessage.Text = sr.ReadLine(); });
}
}, pipeServer);
});
}
private void maskedTextBox1_MaskInputRejected(object sender, MaskInputRejectedEventArgs e)
{
}
}
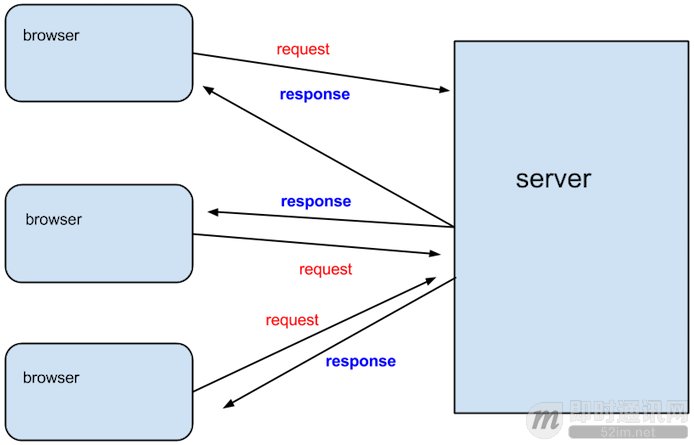
}先运行Server再运行Client
到此这篇关于C#使用命名管道Pipe进行进程通信实例详解的文章就介绍到这了,更多相关C# Pipe进程通信内容请搜索得得之家以前的文章希望大家以后多多支持得得之家!
沃梦达教程
本文标题为:C#使用命名管道Pipe进行进程通信实例详解


猜你喜欢
- WPF使用DrawingContext实现绘制刻度条 2023-07-04
- Oracle中for循环的使用方法 2023-07-04
- 如何使用C# 捕获进程输出 2023-03-10
- .NET CORE DI 依赖注入 2023-09-27
- Unity Shader实现模糊效果 2023-04-27
- 在C# 8中如何使用默认接口方法详解 2023-03-29
- Unity3D实现渐变颜色效果 2023-01-16
- c# 模拟线性回归的示例 2023-03-14
- user32.dll 函数说明小结 2022-12-26
- C# 使用Aspose.Cells 导出Excel的步骤及问题记录 2023-05-16