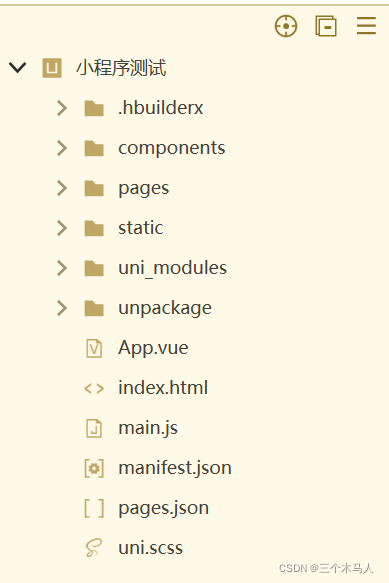
实现横屏签字版可以利用uniapp中的canvas以及第三方的canvas插件实现。
实现横屏签字版可以利用uniapp中的canvas以及第三方的canvas插件实现。
步骤一:安装canvas插件
在uniapp中使用canvas需要下载并安装canvas插件,下载地址为:https://ext.dcloud.net.cn/plugin?id=127
下载完成后,在uniapp项目的根目录下,打开cmd或者终端并输入如下命令:
npm install canvas-uniapp -S
步骤二:创建canvas画布
在uniapp中,我们可以使用view标签来创建canvas画布,例如:
<view style="width: 100vw; height: 100vh;">
  <canvas
    canvas-id="canvas"
    style="width: 100vw; height: 100vh;"
    @touchstart="startDraw"
    @touchmove="onDraw"
    @touchend="endDraw"
  ></canvas>
</view>
在canvas标签中,指定了canvas-id为canvas,在js中可以通过uni.createSelectorQuery().select('#canvas')获取到canvas实例,进而进行绘图操作。在touchstart/touchmove/touchend事件中,分别触发开始绘制、绘制中、结束绘制的事件处理函数。
步骤三:编写绘图代码
绘图代码可根据需求自行编写,以下示例代码演示了如何使用canvas在横屏模式下进行画线:
let ctx = uni.createCanvasContext('canvas')
let painting = false
let lastX = 0
let lastY = 0

uni.onWindowResize(() => {
  let systemInfo = uni.getSystemInfoSync()
  ctx.canvas.width = systemInfo.screenHeight
  ctx.canvas.height = systemInfo.screenWidth
})

function startDraw(e) {
  painting = true
  lastX = e.touches[0].x
  lastY = e.touches[0].y
}

function onDraw(e) {
  if (!painting) return
  ctx.beginPath()
  ctx.moveTo(lastX, lastY)
  ctx.lineTo(e.touches[0].x, e.touches[0].y)
  ctx.stroke()
  lastX = e.touches[0].x
  lastY = e.touches[0].y
}

function endDraw(e) {
  painting = false
}
步骤四:在横屏模式下显示页面
为了在横屏模式下显示绘图页面,需要在manifest.json文件中进行配置:
{
  "h5": {
    "screenOrientation": "landscape"
  },
  "app-plus": {
    "orientation": "landscape",
    "softinputMode": "adjustResize"
  }
}
示例1:在PDF中展示签名页面
我们可以利用uniapp创建的签名页面,在PDF中展示签名页面,并允许用户在该页面上进行签名操作。以下为示例代码:
const width = 595.28 // A4纸的宽
const height = 841.89 // A4纸的高

let ctx = uni.createCanvasContext('canvas')
let painting = false
let lastX = 0
let lastY = 0

uni.onWindowResize(() => {
  let systemInfo = uni.getSystemInfoSync()
  ctx.canvas.width = systemInfo.screenHeight
  ctx.canvas.height = systemInfo.screenWidth
})

function startDraw(e) {
  painting = true
  lastX = e.touches[0].x
  lastY = e.touches[0].y
}

function onDraw(e) {
  if (!painting) return
  ctx.beginPath()
  ctx.moveTo(lastX, lastY)
  ctx.lineTo(e.touches[0].x, e.touches[0].y)
  ctx.stroke()
  lastX = e.touches[0].x
  lastY = e.touches[0].y
}

function endDraw(e) {
  painting = false
}

function savePDF() {
  uni.canvasToTempFilePath(
    {
      canvasId: 'canvas',
      x: 0,
      y: 0,
      destWidth: width,
      destHeight: height,
      fileType: 'pdf',
      quality: 1,
      success: function (res) {
        uni.saveFile({
          tempFilePath: res.tempFilePath,
          success: function (res) {
            uni.openDocument({
              filePath: res.savedFilePath,
              fileType: 'pdf',
              success: function () {
                console.log('打开文档成功')
              },
              fail: function (err) {
                console.log(err)
              },
            })
          },
          fail: function (err) {
            console.log(err)
          },
        })
      },
      fail: function (err) {
        console.log(err)
      },
    },
    this
  )
}
示例2:签字并保存图片至本地相册
我们可以利用uniapp创建的签名页面,让用户进行签名,并将签名保存至本地相册。以下为示例代码:
let ctx = uni.createCanvasContext('canvas')
let painting = false
let lastX = 0
let lastY = 0

uni.onWindowResize(() => {
  let systemInfo = uni.getSystemInfoSync()
  ctx.canvas.width = systemInfo.screenHeight
  ctx.canvas.height = systemInfo.screenWidth
})

function startDraw(e) {
  painting = true
  lastX = e.touches[0].x
  lastY = e.touches[0].y
}

function onDraw(e) {
  if (!painting) return
  ctx.beginPath()
  ctx.moveTo(lastX, lastY)
  ctx.lineTo(e.touches[0].x, e.touches[0].y)
  ctx.stroke()
  lastX = e.touches[0].x
  lastY = e.touches[0].y
}

function endDraw(e) {
  painting = false
}

function saveImage() {
  uni.canvasToTempFilePath(
    {
      canvasId: 'canvas',
      success: function (res) {
        uni.saveImageToPhotosAlbum({
          filePath: res.tempFilePath,
          success: function () {
            console.log('保存图片成功')
          },
          fail: function (err) {
            console.log(err)
          },
        })
      },
      fail: function (err) {
        console.log(err)
      },
    },
    this
  )
}
本文标题为:uniapp实现横屏签字版


- 基于HTML5 Ajax文件上传进度条如何实现(jquery版本) 2022-10-17
- 探究CSS边框特效实现技巧 2023-12-14
- 使用getJSON()异步请求服务器返回json格式数据的实现 2023-02-14
- layui数据表格以及传数据方式 2022-12-13
- vue—监听属性(watch) 2023-10-08
- JavaScript如何获取URL参数 2022-10-29
- js中top的作用深入剖析 2023-12-01
- 关于 html:CSS – 调整浏览器窗口大小时修复边 2022-09-21
- 基于Jquery.history解决ajax的前进后退问题 2022-10-17
- div+css实现带箭头的面包屑导航栏 2023-12-14
