这一节详细的学习一下SpringBoot的静态资源访问相关的知识点。像这样的知识点还挺多,比如SpringBoot2的Junit单元测试等等。本章我们来了解静态资源访问的四种方式
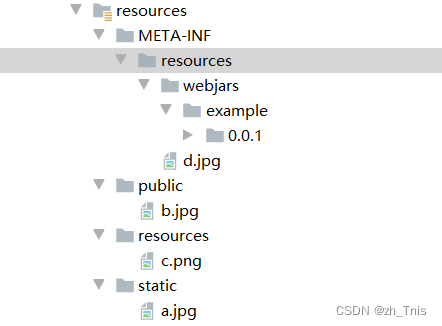
1.默认的静态资源目录
/static
/public
/resources
/META-INF/resources
动态资源目录:/templates
2.resources静态资源目录图片存放
3. 静态资源访问
3.1.通过路径访问静态资源
http://localhost:8080/a.jpg
http://localhost:8080/b.jpg
http://localhost:8080/c.png
http://localhost:8080/d.jpg
3.2.通过配置类配置路径访问本地静态资源
1.config
@Configuration
public class WebMvcConfig implements WebMvcConfigurer {
    @Override
    public void addResourceHandlers(ResourceHandlerRegistry registry) {
        //自定义路径mypic,  addResourceLocations指定访问资源所在目录
        registry.addResourceHandler("/mypic/**").addResourceLocations("file:C:\\Users\\Administrator\\Desktop\\images1\\");
        //自定义路径webjars访问,addResourceLocations映射该路径下的资源,resourceChain资源链
//        registry.addResourceHandler("/webjars/**").addResourceLocations("classpath:/META-INF/resources/webjars/").resourceChain(true);
    }
}
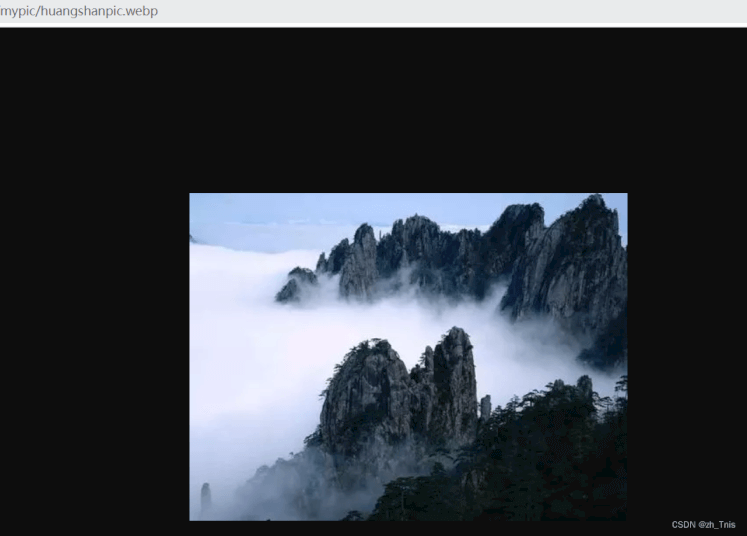
2.访问结果展示
路径:http://localhost:8080/mypic/huangshanpic.webp
3.3.通过配置文件配置路径访问静态资源
(1).application.yml
web.pic-path=C:/Users/Administrator/Desktop/images1/
spring.mvc.static-path-pattern=/mypic/**
spring.web.resources.static-locations=classpath:/META-INF/resources/,classpath:/resources/,classpath:/public/,classpath:/static/,file:${web.pic-path}
web.pic-path:访问路径
spring.mvc.static-path-pattern:采用全部映射到mypic路径的方式
spring.web.resources.static-locations:配置允许访问的静态资源目录
(2).访问路径格式
http://localhost:8080/mypic/a.jpg
http://localhost:8080/mypic/b.jpg
http://localhost:8080/mypic/c.png
http://localhost:8080/mypic/d.jpg
http://localhost:8080/mypic/web.pic-path配置本地路径下的图片名称
3.4.通过引入打包静态资源的jar包形式访问
(1).静态资源打jar包
创建一个新的web工程,只存放静态资源
1).pom.xml
    <artifactId>WWebjarsdemo</artifactId>
    <version>1.0</version>
    <build>
        <resources>
            <resource>
                <!--
                directory   将该路径下的资源(example/0.0.3/资源)打包
                targetPath  成该路径下存储
                -->
                <directory>${project.basedir}/src/main/resources</directory>
                <targetPath>${project.build.outputDirectory}/META-INF/resources/webjars</targetPath>
            </resource>
        </resources>
    </build>
2).静态资源目录结构

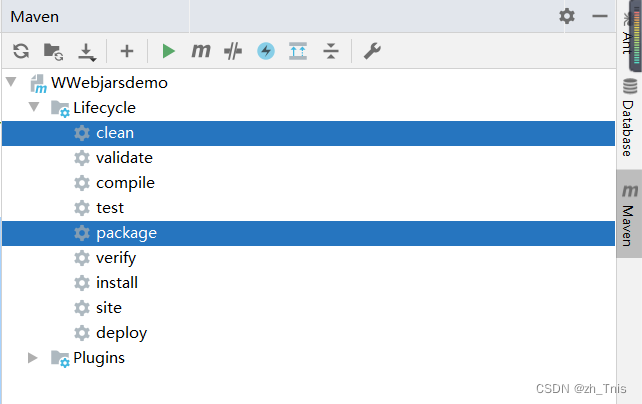
3).package点击打包
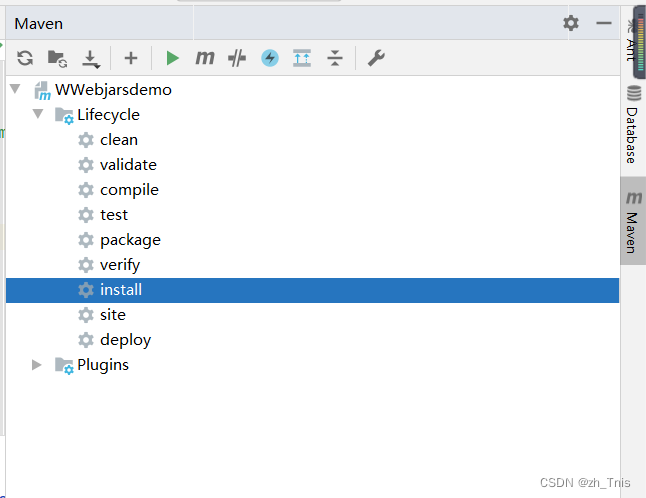
4).install到本地仓库
(2).主项目中引入依赖包
1).pom.xml
        <!--导入依赖的自定义静态资源webjars包-->
        <dependency>
            <groupId>com.openlab</groupId>
            <artifactId>WWebjarsdemo</artifactId>
            <version>1.0</version>
        </dependency>
        <!--为了不再管理版本号-->
        <dependency>
            <groupId>org.webjars</groupId>
            <artifactId>webjars-locator-core</artifactId>
            <version>0.35</version>
        </dependency>
(3).路径访问
未引入webjars-locator-core的jar包:http://localhost:8080/webjars/example/版本号/huangshan.webp
引入webjars-locator-core的jar包:
http://localhost:8080/webjars/example/huangshan.webp
注意:如果主程序和引入打包的jar包静态资源下具备相同的目录结构,如:META-INF\resources\webjars\example\0.0.1\**,可能会出现路径访问失败的情况。
解决方法:clean主程序项目,重新运行。
(4).访问结果

到此这篇关于SpringBoot深入探究四种静态资源访问的方式的文章就介绍到这了,更多相关SpringBoot静态资源访问内容请搜索编程学习网以前的文章希望大家以后多多支持编程学习网!
本文标题为:SpringBoot深入探究四种静态资源访问的方式


- JSP页面间传值问题实例简析 2023-08-03
- 深入了解Spring的事务传播机制 2023-06-02
- SpringBoot使用thymeleaf实现一个前端表格方法详解 2023-06-06
- ExecutorService Callable Future多线程返回结果原理解析 2023-06-01
- Java中的日期时间处理及格式化处理 2023-04-18
- Springboot整合minio实现文件服务的教程详解 2022-12-03
- Spring Security权限想要细化到按钮实现示例 2023-03-07
- 基于Java Agent的premain方式实现方法耗时监控问题 2023-06-17
- Java实现顺序表的操作详解 2023-05-19
- JSP 制作验证码的实例详解 2023-07-30

